How to make and share a shared album on Google Photos?
2024-03-16
3108
6
Welcome to Blackview (Well-known brand of military grade rugged phone) blog. Hope the guide has been helpful.
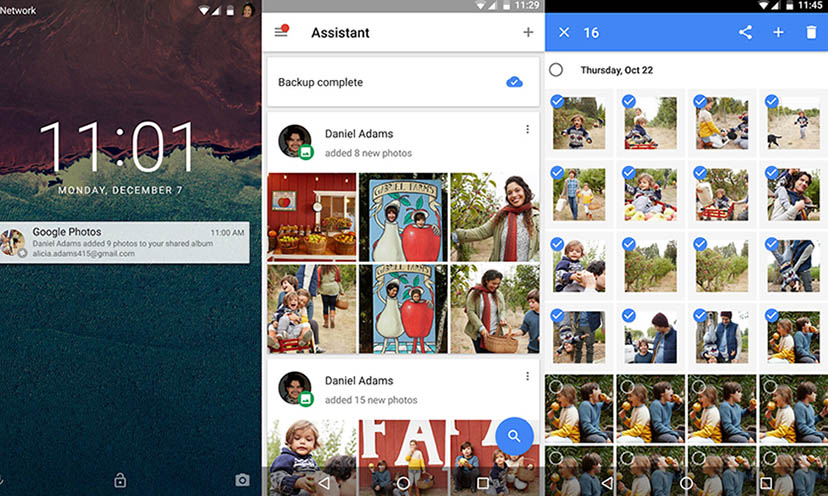
Google Photos has many surprising features for trying. Sharing memories with loved ones is even more enjoyable with Google Photos' shared albums. This guide will walk you through everything you need to know, from creating the album to inviting collaborators and managing access.
Creating a Shared Album
There are two main ways to create a shared album on Google Photos:
On your phone/iPhone/iPad/tablet:
- Open the Google Photos app and sign in to your Google Account.
- Tap "Photos" at the bottom.
- Select the photos or videos you want to add to the album.
- Tap the "+" icon at the top right and choose "Shared album."
- Give your album a descriptive title.
- Tap "Share" to finalize.
On your computer:
- Go to https://www.google.com/photos/about/ and sign in to your Google Account.
- Click "Photos" on the left panel.
- Select the photos or videos you want to share.
- Click the "+" icon at the top right and choose "Shared album."
- Enter a title for your album.
- Click "Share" in the top right corner.
Share your Album
There are two ways to share your album:
By inviting specific people:
- In the sharing menu (mobile or desktop), enter the email addresses or phone numbers of the people you want to invite.
- You can add a message to personalize the invitation.
- Click/Tap "Send" to invite them.
By creating a shareable link:
- In the sharing menu, click/tap "Create link."
- You can choose who can view the album with this link: anyone with the link, or only those you've specifically invited with additional permission controls.
- Anyone with the link can then access the album on their devices.
Managing Collaborators and Permissions
- On Android phone/tablet/iPhone/iPad: Open the shared album, tap the three dots in the top right corner, and select "Manage collaborators." Here you can add or remove people, change their permission levels (view only or add photos/videos), and copy the shareable link.
- On computers: Open the shared album, click the three dots in the top right corner, and select "Sharing settings." You can then manage collaborators and permissions similar to the mobile app.
Other related guides,
- How to share iPhone screen on TV?
- How to share a live location to friends on WhatsApp?
- How to Share Location with family members/friends on Google Maps?
- How to delete Instagram account on Android?
- How to Take 360 Degree Panorama Photos?
- How to copy text from image?
Additional Tips
- Choose meaningful album titles: Descriptive titles help people understand what the album is about.
- Add captions to your photos: Captions can tell stories and add context to your photos.
- Encourage collaboration: If you want others to contribute photos, choose the "add photos/videos" permission level when inviting them.
- Manage storage space: Shared albums don't count towards your personal storage space, but be mindful of the total storage used by collaborators if they add many photos/videos.
By following these steps and tips, you can easily create and manage shared albums on Google Photos, making it a great way to share memories with friends and family.
6