The 5 best AI apps for whiten yellow teeth in photos (Android/iOS)
Welcome to Blackview (World's well-known brand of rugged phone and tablet) blog. Hope this guide has been helpful.
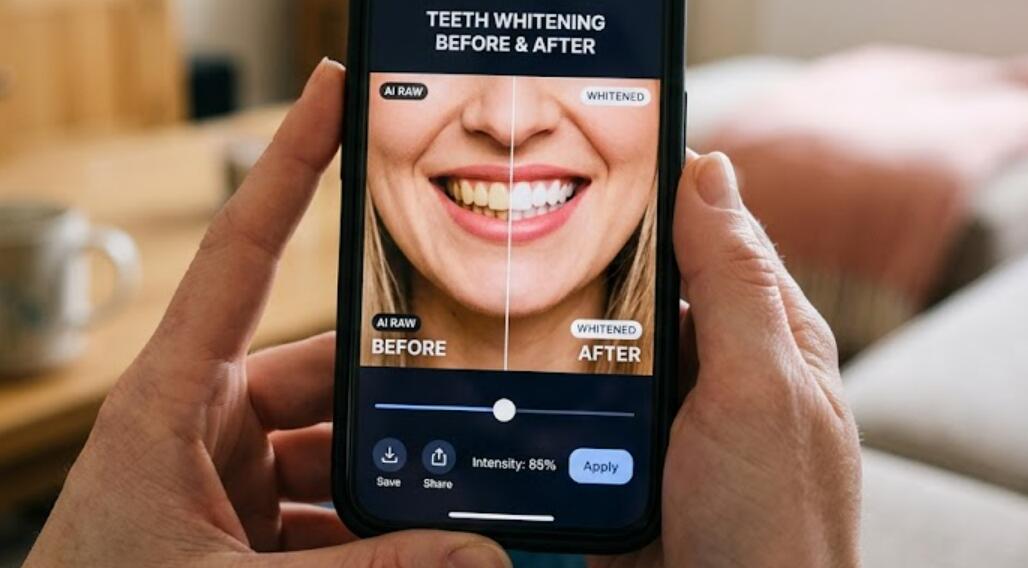
Yellow teeth in photos do not always mean that your teeth are actually yellow. Warm indoor lighting, camera exposure, shadows, filters, and the color temperature of a photograph can all make teeth appear darker or more yellow than they look in real life. Fortunately, AI-powered photo editing apps can recognize facial features and apply targeted whitening effects, allowing you to brighten a smile without manually editing every tooth.
With the right app, whitening teeth in a photo can take only a few seconds. Some apps provide one-tap AI enhancement, while others give you more detailed control over whitening intensity, brush size, and individual areas. In this guide, we will look at five of the best apps for whitening yellow teeth in photos. We will also explain how to use each app and whether it works on Android, iPhone, or both platforms.
- Read also: How to remove a person from a photo?
- How to add someone to a photo on Android?
- Best apps to remove wrinkles from clothes in photos
- The 5 free palm reading scanner apps for Android/iOS
5 Best AI apps for whitening teeth
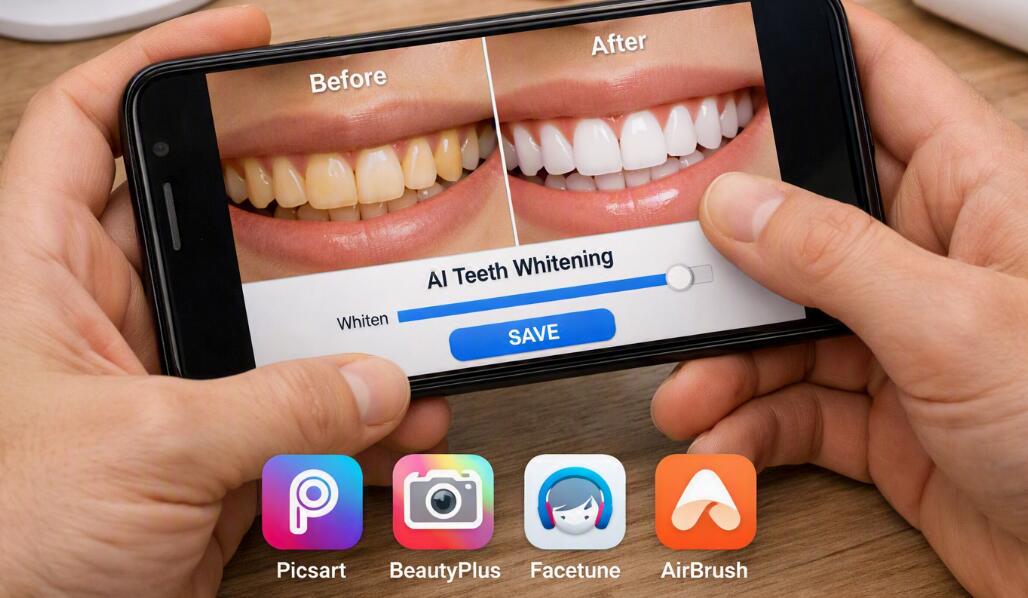
If you want to quickly compare the five options before reading the detailed reviews, here is the complete list:
- Facetune — A dedicated portrait editor with AI-assisted teeth whitening and detailed retouching tools.
- AirBrush — A flexible beauty editor that combines teeth whitening with manual editing controls.
- BeautyPlus — A selfie-focused editor with teeth whitening and a wide range of beauty enhancement features.
- Picsart — A versatile AI photo editor that lets you whiten teeth as part of a broader editing workflow.
- Perfect365 — A beauty and virtual makeup app with tools specifically designed for facial enhancement and teeth whitening.
All five apps are available for both Android and iOS, although specific features, operating-system requirements, and premium functions can vary between versions. If your main goal is simply to make yellow teeth look brighter, any of these apps can work, but the editing experience differs considerably from one application to another. So, let's dive in.
1. Facetune
Facetune is one of the most recognizable mobile portrait-editing applications and is particularly well suited to people who want to improve a smile while making other subtle facial adjustments. Its teeth-whitening function is designed to identify visible teeth and brighten them without requiring users to manually edit every part of the smile.
One of the main advantages of Facetune is its combination of automatic enhancement and user control. You can begin with an automated whitening effect and then adjust the strength so the teeth do not look excessively bright. This makes it useful for both casual selfies and more carefully edited portraits.
How to whiten teeth with Facetune
- Open Facetune on your phone.
- Import the photo you want to edit.
- Open the portrait retouching tools.
- Select the teeth-whitening or whitening function.
- Allow the app to detect the visible teeth.
- Adjust the whitening intensity gradually.
- Zoom in and check the edges around the teeth, lips, and gums.
- Compare the edited image with the original.
- Save the photo when the result looks natural.
Facetune is suitable for both Android and iOS. It is a particularly useful choice if teeth whitening is only one part of the edit. After improving the smile, you can continue adjusting other facial details or making general portrait corrections within the same application.
What makes Facetune useful?
The biggest advantage is control. A one-tap whitening effect may be convenient, but different photographs require different levels of correction. Facetune allows you to reduce the intensity when the automatic effect is too strong. For realistic results, it is generally better to make several subtle adjustments than to maximize the whitening effect.
2. AirBrush
AirBrush is another popular mobile photo editor focused heavily on portraits and beauty enhancement. Its teeth-whitening feature can be useful when automatic editing is not enough and you want to manually control exactly where the whitening effect is applied.
AirBrush is especially helpful for photos where the smile is partially hidden, photographed from an angle, or affected by uneven lighting. Manual controls can give you greater precision than an entirely automatic effect, although they require slightly more time.
How to whiten teeth with AirBrush
- Open AirBrush and select your portrait.
- Enter the retouching tools.
- Select the Whiten feature.
- Adjust the brush size according to the size of the teeth.
- Apply the whitening effect gently across the visible teeth.
- Zoom in to work around the gum line and lips.
- Use the eraser if the effect extends beyond the teeth.
- Zoom out and inspect the entire face.
- Save the finished photograph.
AirBrush is available on Android and iOS. Because it provides manual editing options, it can be particularly useful for users who want to correct specific teeth rather than applying exactly the same effect across the entire smile.
When should you use AirBrush?
AirBrush is a good option when precision matters. For example, if one tooth appears darker because of a shadow, a broad automatic whitening effect may make the entire smile look unnatural. With manual control, you can make a smaller correction to the affected area and preserve the natural appearance of the other teeth.
3. BeautyPlus
BeautyPlus is designed primarily for selfies and beauty photography, making it a convenient choice for users who frequently edit portraits before sharing them on social media. Its beauty-retouching tools include teeth whitening alongside other facial enhancement features.
The app is particularly convenient for straightforward selfie editing. You can import an image, apply the whitening effect, adjust its strength, and then continue with other enhancements if necessary. This makes it suitable for users who want a simple editing workflow without learning complicated photo-editing techniques.
How to whiten teeth with BeautyPlus
- Open BeautyPlus.
- Select the portrait or selfie you want to edit.
- Open the retouching section.
- Find the teeth-whitening function.
- Apply the whitening effect.
- Adjust the whitening level until the teeth look natural.
- Zoom in to check the areas around the mouth.
- Compare the result with the original image.
- Save the edited photo.
BeautyPlus is available for Android and iOS. In addition to teeth whitening, it provides various selfie-oriented tools, so it can be convenient when you want to make several small improvements to the same portrait.
How to avoid over-editing
The most common mistake when whitening teeth is choosing an intensity that is too high. Natural teeth are not completely white, and excessive whitening can create a noticeable contrast between the teeth and the rest of the face. Start with a low setting and gradually increase it until the yellow tone is reduced without removing all natural shading.
4. Picsart
Picsart is different from the other applications on this list because it is designed as a broader photo-editing platform rather than solely as a beauty editor. It combines AI-powered tools, portrait retouching, creative effects, background editing, and other image-editing functions.
This makes Picsart useful when whitening teeth is only one part of the final image. For example, you may want to whiten a smile, remove an unwanted object, adjust lighting, improve the background, and apply a final color correction without switching between multiple applications.
How to whiten teeth with Picsart
- Open Picsart on your phone.
- Tap the option to create a new edit.
- Choose the portrait from your photo library.
- Open the Retouch tools.
- Find the available teeth-whitening function.
- Apply the whitening effect carefully.
- Adjust the intensity if necessary.
- Inspect the smile at normal viewing size.
- Save the completed image.
Picsart is available on Android and iOS. Its wide range of editing tools makes it suitable for users who want more than simple facial retouching. However, because it includes many functions, the interface may feel more complicated than a dedicated beauty application.
Why choose Picsart?
Choose Picsart if you want an all-in-one editing environment. It is especially practical for social media images where teeth whitening needs to be combined with other changes. You can correct the smile first and then continue working on the rest of the photograph without exporting and importing the image into another application.
5. Perfect365
Perfect365 is primarily known as a virtual makeup and beauty-editing application, but it also provides facial enhancement tools that can be used to brighten the appearance of teeth in photographs. Its beauty-focused design makes it particularly suitable for selfies, portraits, and images where facial appearance is the main focus.
One advantage of Perfect365 is that teeth whitening can be incorporated into a broader beauty-editing process. You can work on the smile while also adjusting makeup and other facial elements, allowing you to create a consistent overall appearance.
How to whiten teeth with Perfect365
- Open Perfect365 on your Android phone or iPhone.
- Import the photo you want to edit.
- Open the facial or beauty-editing tools.
- Select the teeth-whitening option.
- Choose a suitable whitening level.
- Adjust the effect gradually.
- Inspect the teeth and surrounding areas.
- Compare the edited image with the original.
- Save the final photograph.
Perfect365 supports Android and iOS. It is particularly appropriate for users who are already interested in virtual makeup and portrait enhancement and want teeth whitening to be part of the same editing process.
Which app should you use for different photo-editing needs?
The five applications have overlapping features, but their strengths are somewhat different. Instead of choosing an app based only on the number of advertised AI features, consider the type of photograph you normally edit and how much control you want over the final result.
- For dedicated portrait editing: Facetune provides a focused workflow for improving smiles and other facial details.
- For precise manual corrections: AirBrush is useful when you want greater control over specific areas of the teeth.
- For quick selfie enhancement: BeautyPlus offers a straightforward beauty-editing workflow.
- For complete photo editing: Picsart is useful when teeth whitening needs to be combined with other creative adjustments.
- For beauty and makeup editing: Perfect365 combines smile enhancement with a broader beauty-focused workflow.
All five applications can be used on both major mobile platforms, but the exact feature set may vary. Some tools may also be restricted to premium subscriptions, so it is worth checking the current version of the app before purchasing a subscription.
How to make yellow teeth look natural after AI editing
Using an AI whitening tool does not automatically guarantee a realistic result. The most convincing edits usually make relatively small changes. The objective is to reduce an unwanted yellow cast rather than turn every tooth into a perfectly white shape.
Keep the whitening intensity moderate
Start with a low whitening level and gradually increase it. If the teeth immediately become the brightest part of the entire face, the effect is probably too strong. Natural teeth contain subtle differences in tone, and preserving some of those differences helps the finished photograph look authentic.
Check the edges carefully
AI detection can occasionally affect nearby areas, especially when the teeth are small, partially hidden, or photographed in poor lighting. After applying the effect, zoom in around the lips, gums, tongue, and spaces between teeth. If the app provides an eraser or masking function, use it to correct unwanted areas.
Consider correcting the lighting first
If the entire photograph has a strong yellow or orange color cast, whitening the teeth alone may create an unnatural result. In that situation, a small adjustment to overall color temperature, exposure, or brightness can make the photo look more balanced before you apply targeted teeth whitening.
FAQs
Can these apps really remove yellow teeth from a photo?
Yes. AI and retouching tools can modify the visible color and brightness of teeth in a photograph. They do not physically change the teeth, however. The whitening effect exists only in the edited image.
Are these apps available on both Android and iPhone?
Yes. Facetune, AirBrush, BeautyPlus, Picsart, and Perfect365 all offer versions for Android and iOS. Specific operating-system requirements and individual features may vary depending on the current app version.
Why do my teeth look unnaturally white after editing?
The whitening intensity is probably too high. Reduce the strength and compare the edited photograph with the original. It can also help to zoom out and view the entire portrait rather than judging the teeth alone.
Can I whiten only one tooth?
Some apps provide manual brushes or localized retouching tools that allow you to target a specific area. AirBrush, for example, provides more direct manual control. This can be useful when only one tooth appears darker because of lighting or shadow.
Do I need to pay for teeth-whitening features?
It depends on the application and its current version. Many photo editors can be downloaded for free but reserve certain advanced AI or retouching functions for premium users. Always check the current in-app pricing and subscription terms before purchasing.
Final thoughts
AI photo-editing apps have made it much easier to correct yellow-looking teeth without requiring advanced Photoshop skills. Facetune, AirBrush, BeautyPlus, Picsart, and Perfect365 all provide practical ways to brighten a smile, and each is available for both Android and iOS. The right option depends on whether you prefer automated portrait enhancement, detailed manual control, beauty-focused editing, or a complete photo-editing workflow.
The most important part of teeth whitening in photos is moderation. A small reduction in yellow tones can make a smile look brighter while preserving its natural appearance, whereas excessive whitening can make the teeth look artificial. Start with a subtle adjustment, inspect the edges around the mouth, compare the result with the original, and only then save the final image. This simple workflow can produce a cleaner and more natural-looking smile while keeping the rest of the portrait realistic.