How to add someone to a photo with AI on your phone?
Welcome to Blackview (World's well-known brand of rugged phone and tablet) blog. Hope the guide helps.
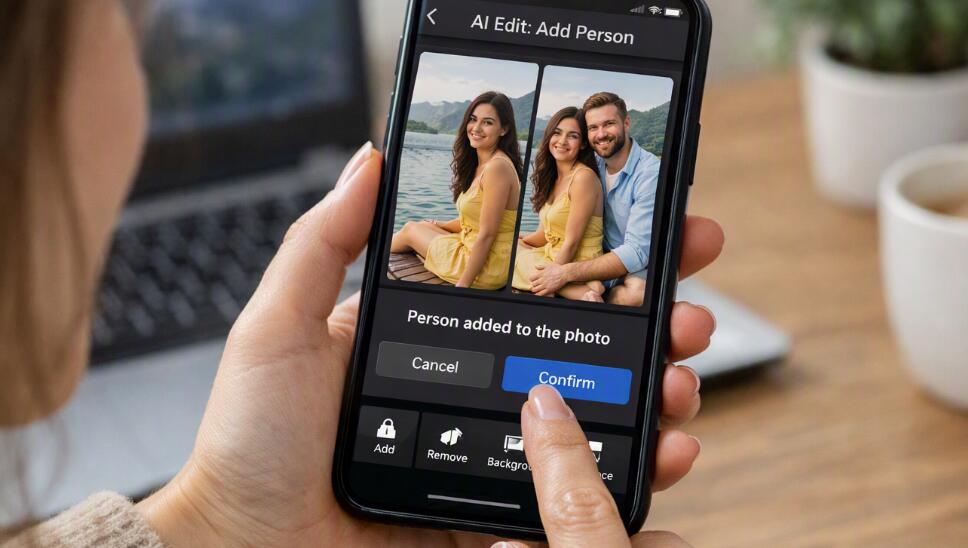
Adding someone to an existing photo used to require advanced desktop editing software, careful masking, and considerable knowledge of layers and perspective. Today, AI-powered photo editors can perform much of this work directly on a smartphone. Whether you want to add a friend who missed a group picture, place a family member into a vacation photo, or create a realistic composite for a creative project, modern AI tools can generate, blend, and adjust a new person with surprisingly little manual editing.
- Read also: How to remove a person from a photo with AI?
- How to whiten yellow teeth in a photo with AI?
- How to remove clothing wrinkles in photos with AI?
The process is slightly different on Android phones and iPhones because available AI editing features vary by device, operating system, and app. Some phones include generative editing features directly in their native gallery, while others rely on third-party AI photo editors. Regardless of the platform, the key steps are similar: choose a suitable source photo, provide a clear reference of the person you want to add, use an AI insertion or generative-editing feature, and then refine the result so the lighting, scale, pose, and perspective look natural.
How to add someone to a photo on an Android phone
Android offers several ways to add a person to a photo with AI. On compatible devices, built-in generative editing tools may allow you to select an area of an image and describe what you want to add. If your phone does not have this capability, an AI photo-editing app can provide a similar workflow.
Method 1: Use a built-in AI photo editor
If your Android phone has an AI-powered editor in its Gallery or Photos application, start there. The exact names of buttons can differ between manufacturers and software versions, but look for options such as Generative Edit, AI Edit, Magic Editor, or similar features.
- Open the Gallery or Photos app on your Android phone.
- Select the photo where you want to add the person.
- Tap Edit and look for the phone's AI or generative editing feature.
- Use the selection tool to identify the area where the new person should appear.
- Enter a description such as “a man standing beside the woman” or “a person sitting on the empty chair.”
- Let the AI generate one or more versions of the edited image.
- Compare the generated results and select the version with the most natural composition.
- Use additional editing tools to adjust cropping, brightness, or positioning if necessary.
- Save the finished image as a new copy so the original photograph remains unchanged.
The most important part is selecting an appropriate empty area. AI generally produces better results when there is enough physical space for the person and when the surrounding background provides visual clues about scale and perspective.
Method 2: Use an AI photo-editing app
If your Android device does not provide a suitable built-in feature, you can use a third-party AI editor that supports generative fill, AI object insertion, or image compositing. The general workflow is straightforward.
- Install an AI photo-editing application that supports generative image editing.
- Import the photo you want to modify.
- Select the empty area where the person should be placed.
- Choose the AI generation, generative fill, or add-object function.
- Upload a suitable reference photo of the person when the app supports image references.
- Describe the desired result, including the person's position, clothing, pose, and relationship to nearby subjects.
- Generate several variations rather than relying on the first result.
- Check the person's face, hands, body proportions, shadows, and interaction with the background.
- Make corrections with masking or additional prompts if the result looks unnatural.
- Export the final image at the highest practical quality.
When using a reference image, choose a clear photograph in which the person's face and body are visible. A reference with a similar camera angle and lighting to the original photo can significantly improve the final composition.
How to add someone to a photo on an iPhone
On iPhone, the easiest approach depends on the AI features available in your current version of iOS and the photo-editing apps installed on your device. Some recent iPhone workflows can use Apple's built-in AI-assisted editing capabilities, while dedicated third-party applications can offer more specialized generative tools.
Method 1: Use Apple's AI-assisted photo editing features
If your iPhone supports the necessary AI photo features, you may be able to perform generative edits directly or through Apple's supported photo-editing workflow. Feature availability can depend on the iPhone model, software version, language, and region.
- Open the Photos app and select the photograph you want to edit.
- Tap Edit and look for available AI or generative editing options.
- Select the area where you want the additional person to appear.
- Describe the person or object you want the system to generate when prompted.
- If the feature supports reference images, provide a suitable photograph of the person.
- Review the generated version and repeat the generation if the placement is incorrect.
- Adjust the image using available editing controls such as crop, exposure, or brightness.
- Save the edited result while preserving the original image whenever possible.
Method 2: Use a third-party AI editor on iPhone
A dedicated AI editing app may be the better choice when you need to insert a specific person rather than generate a generic person. These apps can offer more control over reference images, masks, prompts, and composition.
- Download an AI photo editor from the App Store.
- Import the original photo into the editor.
- Choose the generative fill, AI insert, or similar editing function.
- Mark the location where the person should be added.
- Add a reference photograph if the application supports person references.
- Write a detailed prompt describing where the person should stand or sit.
- Generate multiple versions and compare their facial and body details.
- Refine the mask or prompt when the person overlaps with existing subjects.
- Check shadows, skin tones, clothing edges, and background continuity.
- Export the final image after confirming that the composition looks natural.
For both Android and iPhone, avoid extremely vague prompts. Instead of simply requesting “add my friend,” describe the position and context: “Add the person standing on the right side of the group, facing the camera, matching the existing daylight and perspective.” Specific instructions give the AI more useful information about the intended composition.
How to choose the best photo of the person
The quality of the reference image can determine whether the final composite looks convincing. Ideally, the reference photograph should show the person's face clearly and contain enough of their body for the AI to understand posture and proportions. Similar lighting conditions are particularly valuable.
Look for matching visual conditions
A person photographed indoors under warm artificial lighting may look noticeably out of place when inserted into a bright outdoor photograph. Whenever possible, choose a reference image with a similar viewing angle, light direction, image quality, and approximate camera distance.
How to make the AI result look realistic
AI can create an impressive first draft, but the first generated image is not always perfect. Examine the result at full size rather than judging it only from a small thumbnail.
- Check whether the person's size matches nearby people.
- Make sure feet and body positions align naturally with the ground.
- Look for incorrect fingers, hands, teeth, or facial details.
- Check whether shadows fall in the same direction as existing shadows.
- Make sure clothing edges do not blend incorrectly into the background.
- Compare the person's sharpness and image noise with the original photograph.
A convincing composite usually depends on consistency rather than simply producing a detailed face. Perspective, lighting, depth, and shadows all need to agree with the original photograph.
How to write better AI prompts
A good prompt should explain what to add, where to put it, and how it should interact with the existing scene. Include details that are visually important but avoid unnecessarily complicated descriptions.
A useful prompt structure
Try describing the person + position + pose + clothing + lighting + perspective. For example: “Add this person standing behind the group on the left, facing the camera, wearing a casual blue jacket, with the same afternoon sunlight and camera perspective as the original photo.”
Privacy and consent when using AI photo editing
Before uploading photographs to an AI editing service, consider how the service handles uploaded images. A photo can contain faces, locations, children, private surroundings, or other personal information. Review the application's privacy policy and permissions, particularly when using a cloud-based service.
If you are adding another real person to an image, especially for public posting or commercial use, consider whether you have their permission. AI editing makes image manipulation easy, but responsible use still requires respect for people's privacy and the context in which the finished image will be shared.
Common problems and how to fix them
Several issues appear frequently when AI adds a person to an existing photograph. Understanding them can save time and reduce the need for repeated generations.
- Wrong scale: Tell the AI whether the person should be closer to the camera or farther away.
- Incorrect pose: Specify whether the person should be standing, sitting, walking, or facing the camera.
- Strange face: Use a clearer reference image and regenerate the result.
- Bad hands: Try a pose in which the hands are less visually complicated.
- Unnatural shadows: Ask the AI to match the existing light direction and shadow intensity.
- Background distortion: Refine the selection area so the AI changes only the intended portion of the image.
Final checklist before saving the edited photo
Before sharing an AI-edited photograph, zoom in and inspect important details. Check the face, eyes, hands, hair, clothing, feet, shadows, and edges around the inserted person. Then zoom back out and consider whether the overall scene looks believable. If something immediately attracts attention, make another generation or refine the edit rather than accepting the first result.
For the best results, keep the original photograph untouched and save the AI-generated version separately. This allows you to experiment with different prompts and compositions without permanently changing the source image.
At the end
Adding someone to a photo with AI is now possible on both Android phones and iPhones without requiring professional desktop editing skills. Android users can take advantage of compatible built-in generative tools or third-party AI editors, while iPhone users can use available Apple editing features or specialized applications. The exact interface will vary, but the fundamental workflow remains the same: select the right image, identify the correct placement, provide a strong reference, describe the desired result, and carefully review the generated image.
The most realistic results come from treating AI as an editing assistant rather than a one-click solution. Good source photographs, accurate prompts, matching lighting, correct perspective, and a final quality check can make the difference between an obvious AI composite and an image that fits naturally into the original scene.