How do you share your Location with friends on Instagram?
Instagram is one of the world’s most popular social media platforms, enabling users to share photos, videos, and stories with their followers. Among its many interactive features, Instagram allows users to share their location—either as a one-time check-in or as a live, real-time update. This feature can be incredibly useful, whether you want to let friends know where you’re traveling, promote a local business, or simply discover trending spots nearby. Additionally, location tags can enhance engagement, as posts with tagged locations often reach a wider audience. In this step-by-step guide, we’ll explain how to share your location on Instagram, covering both temporary and live-sharing options to suit your needs.
Sharing Location on Instagram
Step 1: Enable Location Services on Your Phone
Before you can share your location on Instagram, ensure that location services are enabled on your phone (including rugged smartphone). To do this, go to your phone's settings and look for the "Location" or "Privacy" section. Make sure that location services are turned on for Instagram.
Step 2: Open Instagram and Access Your Profile
Launch the Instagram app on your phone and log in to your account. Once you are on the home screen, tap on the profile icon located at the bottom right corner of the screen. This will take you to your Instagram profile.
Step 3: Edit Your Profile
On your profile page, look for the "Edit Profile" button and tap on it. This will allow you to make changes to your profile information, including your bio and contact details.
Step 4: Add Your Location Information
Scroll down to the "Private Information" section and locate the "Email" field. Next to the email field, you will find a location icon. Tap on this icon to add your location information.
Step 5: Choose Your Location
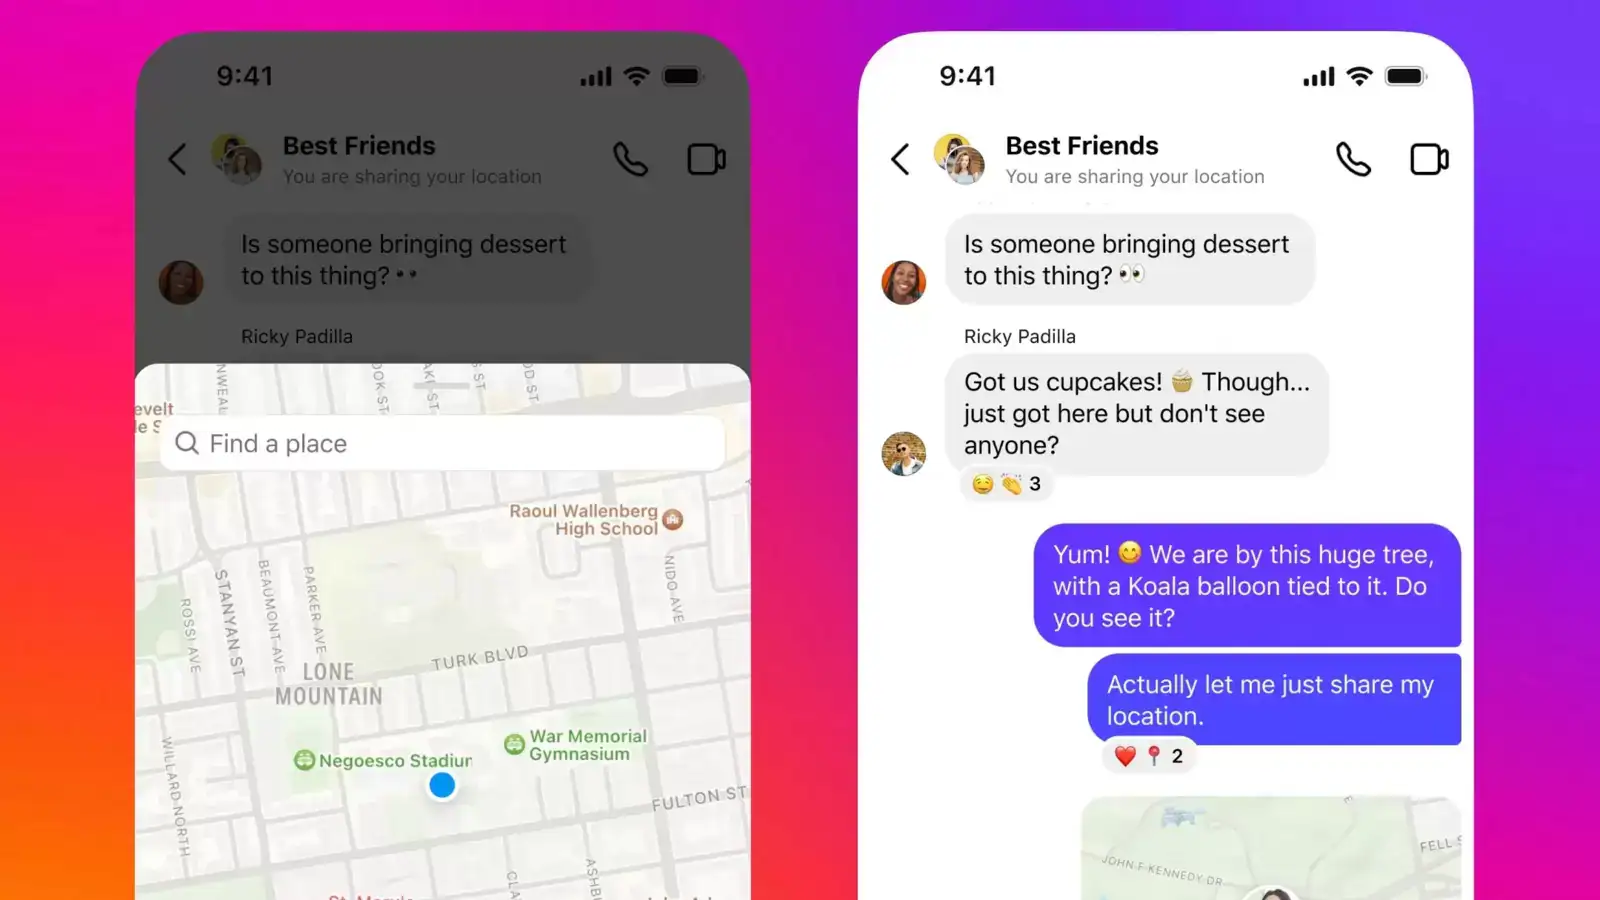
Instagram will show you recommended places near your current location. You can also look up a specific place by entering its name in the search bar. Simply tap on the location you want to choose it.
Step 6: Save Your Changes
After selecting your location, tap on the "Done" or "Save" button to save your changes. Your location information will now be visible on your Instagram profile.
Step 7: Share Your Location in Posts or Stories
To share your location in a post, tap on the "+" button at the bottom of the screen to create a new post. Select a photo or video from your gallery, apply any desired filters or edits, and proceed to the caption screen. Tap on the location icon (a pin symbol) and select your desired location from the list. You can also search for a location manually by typing in the search bar. Once you've added the location, complete your caption and share your post.
To share your location in a story, tap on the camera icon at the top left corner of the home screen or swipe right from your feed. Capture a photo or video or select one from your gallery. On the editing screen, tap on the sticker icon (a square smiley face) and select the location sticker. Again, search for your desired location or choose from the suggested ones. Adjust the location sticker's size and position, and then share your story.
- Related: How to Share Location with other people on Google Maps?
- And, how to share a live location to friends on WhatsApp?
Sharing Live Location on Instagram
Step 1: Enable Location Services on Your Phone
Before sharing your live location on Instagram, check that location services are enabled on your phone. Go to your phone's settings and look for the "Location" or "Privacy" section. Make sure that location services are turned on for Instagram.
Step 2: Open Instagram and Access Your Stories
Launch the Instagram app on your phone and log in to your account. Once you are on the home screen, navigate to the Stories creation screen by tapping the camera icon in the upper left corner of the home screen, or alternatively, swipe right from your feed.
Step 3: Access the Location Sticker
On the Stories creation screen, capture a photo or video or select one from your gallery. Once you have your content ready, tap on the sticker icon, which looks like a square smiley face, located at the top of the screen.
Step 4: Add the Live Location Sticker
In the sticker options, look for the "Location" sticker. It is typically represented by a pin symbol. Tap on the "Location" sticker to add it to your story.
Step 5: Enable Live Location Sharing
After adding the "Location" sticker, you will see an option to enable live location sharing. Tap on the toggle switch or the "Live" button to activate it. Instagram will ask for your permission to share your live location.
Step 6: Choose the Duration of Live Location Sharing
You can select the duration for which you want to share your live location. Instagram offers options like 15 minutes, 1 hour, 4 hours, or "Until I turn it off." Choose the desired duration by tapping on it.
Step 7: Customize and Share Your Story
Once you have enabled live location sharing and selected the duration, you can customize your story further. You can resize and reposition the "Location" sticker, add text, drawings, or other stickers to your story. Once you are satisfied with the content, tap on the "Your Story" button to share it with your followers.
Step 8: Managing Live Location Sharing
While your live location is being shared, you can manage and monitor it. Swipe up on your story to view the number of viewers and who is watching your live location. You can also swipe right to access the camera screen again and continue sharing additional stories.
Step 9: Stop Sharing Your Live Location
To stop sharing your live location before the selected duration expires, return to the Stories creation screen. Swipe left on your story or tap on the "X" icon at the top left corner of the screen to cancel the live location sharing.
Conclusion
Sharing your location on Instagram can be a fun and engaging way to let your friends and followers know where you are. By following the step-by-step guide outlined above, you can easily enable location services, add your location to your profile, and share your location in posts and stories. Remember, be mindful of your privacy and only share your location with people you trust. Enjoy exploring and sharing your favorite places on Instagram!
Read also,