How to enable/disable call forwarding on Android?
Welcome to Blackview (Well-known brand of military grade rugged phone) blog. Hope this "call forwarding setting" guide has been helpful.
Call forwarding is a handy feature that lets you redirect your incoming calls to another phone number, like your voicemail or a colleague's phone. This guide will equip you with everything you need to know about enabling and disabling call forwarding on your Android device, covering both menu methods and code shortcuts.
Understanding Call Forwarding Options:
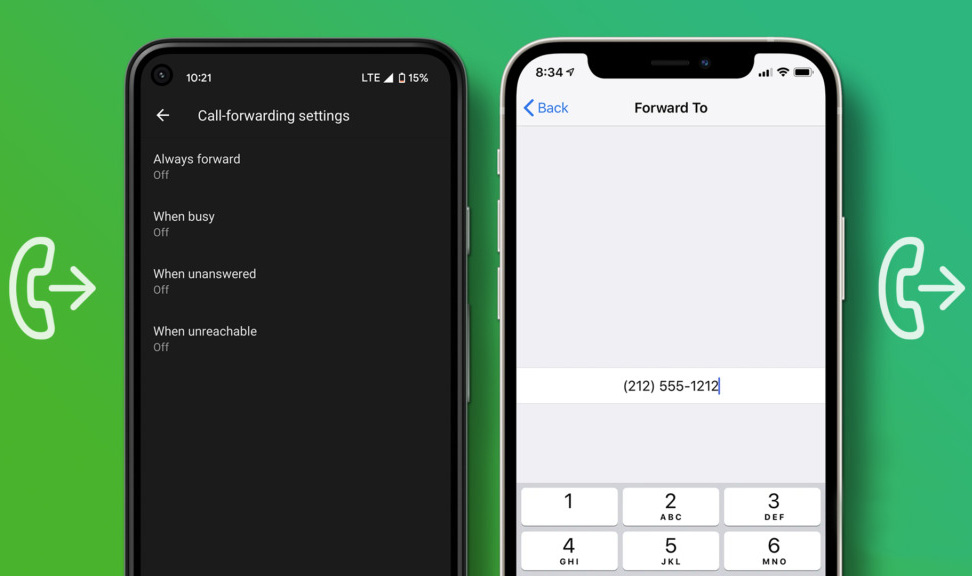
There are three main call forwarding scenarios you might want to address:
- Always Forward: All your calls are redirected to another number.
- Forward When Busy: Calls are forwarded only when your line is busy, on another call, or unavailable.
- Forward When Unanswered: Calls are forwarded only if you don't answer within a certain number of rings.
Method 1: Using the Phone App Menu
- Launch the Phone app on your Android device.
- Tap the Menu icon (usually three dots) in the top right corner.
- Select Settings. Depending on your device, you might see this as a separate option or within a submenu called "Calls."
- Navigate to Call Forwarding.
- You'll likely see separate sections for each of your SIM cards (if you have a dual SIM device). Choose the SIM card for which you want to manage call forwarding.
- Select the type of call forwarding you want to enable or disable (Always Forward, Forward When Busy, or Forward When Unanswered).
- Enter the phone number where you want calls to be forwarded.
- Tap Turn on to enable call forwarding for the chosen scenario.
- To disable call forwarding, simply toggle the switch back to Off.
- Related: Easy guide on how to make phone calls from the US to China
- Can I make phone calls with a tablet?
- Can phone be hacked through call?
- How to record WhatsApp video call with audio automatically?
Method 2: Using Code Shortcuts (Dialer Codes)
This method offers a quicker way to manage call forwarding using your phone's dialer app:
Enable Call Forwarding:
- Always Forward: *72 + Phone Number (including area code) # (Press send after entering the phone number).
- Forward When Busy: *67 + Phone Number (including area code) # (This code might be carrier specific. Consult your carrier for confirmation.)
- Forward When Unanswered: *61 + Number of rings (usually 5 or 30) + Phone Number (including area code) # (This code might be carrier specific. Consult your carrier for confirmation.)
Disable Call Forwarding:
All Forwarding: Dial *#21# and press call. (Carrier-specific codes might exist for disabling specific forwarding types. Refer to your carrier's support website for details.)
Important Notes:
- The exact code sequences for enabling/disabling call forwarding might differ slightly depending on your carrier. You can usually find these codes on your carrier's website or by contacting their customer support.
- Call forwarding might incur additional charges from your carrier. Check your plan details to be sure.
Additional Tips:
Before enabling call forwarding, it's a good idea to inform the person whose number you'll be forwarding calls to.
If you're unsure about any step, consult your device's user manual or contact your carrier's customer support for assistance.
By following this guide, you'll be able to confidently manage call forwarding on your Android device, ensuring you never miss an important call!